The can opener, often relegated to the back of a kitchen drawer, is a surprisingly complex and indispensable tool. Far from a mere gadget, a quality can opener transforms sealed containers into accessible ingredients with ease and, crucially, safety. Whether you’re a seasoned chef or a home cook reaching for pantry staples, understanding the different types of can openers, their history, and how to use them effectively can elevate your kitchen experience significantly. Let’s peel back the layers and uncover everything you need to know about this humble yet powerful kitchen workhorse.
|
Our Picks for the Best Can Opener in 2026
As an Amazon Associate I earn from qualifying purchases.
|
||
| Num | Product | Action |
|---|---|---|
| 1 | Davivy Can Opener Extra-Tall Electric, Stainless Steel 3-in-1 Can Opener with Knife Sharpener & Bottle Opener, Automatic One-Touch Operation, Wide Stable Base, Cord Storage, Fiery Red |

|
| 2 | Commercial Can Opener, ICEKATl Can Opener Manual Heavy Duty Easy for Big Cans with Magnet, Folding Hand Crank With Comfortable Long Handles |
|
| 3 | Zulay Kitchen Heavy Duty Stainless Steel Can Opener Manual with Bottle Opener - Rust Proof Manual Can Opener With Turn Knob & Comfy Soft Grip Handles - Black |
|
| 4 | Premium Multifunctional Magnetic Manual Can Opener and Bottle Opener, Heavy Duty Stainless Steel Sharp Cutting Blade and Oversized Easy Turn Knob, Soft-Touch Handle, Kitchen Use, Orange |
|
| 5 | GORILLA GRIP Heavy Duty Stainless Steel Smooth Edge Manual Can Opener, Soft Comfortable Handle, Large Handheld Turn Knob, Built-In Bottle Openers, US Designed, Holiday Prep Kitchen Essential, Black |
|
| 6 | Kitchen Mama Auto Electric Can Opener: Open Your Cans with A Simple Press of Button - Automatic, Hands Free, Smooth Edge, Food-Safe, Battery Operated, YES YOU CAN (White) |
|
| 7 | Can Opener Manual, Handheld Strong Heavy Duty Stainless Steel Can Opener, Comfortable Handle, Sharp Blade Smooth Edge, Can Openers with Multifunctional Bottle Opener |
|
| 8 | KitchenAid Classic Multifunction Can Opener and Bottle Opener Easy to Use, Razor Sharp Stainless Steel Cutting Wheel, Soft Ergonomic Handles, Pistachio |
|
| 9 | Can Opener, No-Trouble-Lid-Lift Manual Handheld Can Opener with Magnet, Smooth Edge Safe Cut for Beer/Tin/Bottle, Big Turning Knob Anti-Slip Handle Good for Seniors with Arthritis |
|
| 10 | Heavy Duty Manual Can Opener Smooth Edge, Hand Crank Cans Opener for Adults Seniors, Kitchen Camping Tools, Stainless Steel, Black |
|
A Rich History: The Evolution of the Can Opener
The journey of the can opener is as fascinating as the history of canned food itself. Imagine a world where opening a can meant reaching for a hammer and chisel—that was the reality for over half a century after the invention of the tin can.
Canning emerged in the early 1800s, a direct response to Napoleon Bonaparte’s call for a better way to preserve food for his armies. Early cans, crafted from robust wrought iron and tin, were incredibly thick and formidable. This meant that while the food inside might be preserved, accessing it was a true feat of strength.
It wasn’t until 1858 that the first true can opener made its appearance, patented by American inventor Ezra J. Warner. His design featured a sharp blade that pierced the lid, combined with another component to saw around the edge. While a groundbreaking innovation for its time, especially for soldiers during the Civil War and grocers opening cans for customers, Warner’s invention was far from perfect. It left behind dangerously jagged edges, making it unsuitable for widespread domestic use.
A significant improvement arrived in 1870 when William Lyman introduced a rotary cutter, laying the foundation for what we recognize as the modern can opener. This design began to make the process more manageable and safer. However, it was Charles Arthur Bunker who, in 1931, patented the tooth-wheeled crank design that became the standard for manual can openers we still rely on today. This design was efficient and practical for home use. For commercial kitchens, the 1940s saw further innovation with the development of large-scale, heavy-duty models like the Bonzer Benchtop, designed for high-volume use in hotels and restaurants. From a hammer and chisel to the ergonomic tools of today, the can opener has certainly come a long way!
Popular Types of Can Openers: Finding Your Perfect Match
Just like there are many ways to cook, there are several distinct types of can openers, each with its own benefits and operation. Understanding these differences is key to choosing the best can opener for your kitchen and lifestyle.
Manual Can Openers
These are the most common and often the most compact. They rely on your physical effort to operate, but modern designs have greatly improved their comfort and efficiency.
- Traditional Rotary (Top-Cut): When most people picture a can opener, this is often what comes to mind. These models work by clamping onto the top of the can’s rim. A sharp blade punctures the lid, and as you turn a crank or knob, gears rotate the can, cutting a circular path around the top edge. While generally intuitive to use, a common drawback is that they can leave sharp, jagged edges on both the lid and the can itself, posing a safety risk. However, many models feature comfortable, soft-grip handles and large, easy-to-turn knobs, making them user-friendly.
- Side-Cut / Smooth-Edge / Safety Can Openers: These innovative can openers take a different approach to opening cans, focusing on safety. Instead of cutting down into the lid, they latch onto the side of the can, just below the rim. As you turn the knob, the blade cuts horizontally around the can’s circumference. The magic here is that the lid is separated from the can without creating any sharp edges, as the cut occurs in a way that doesn’t expose raw metal. This leaves a smooth edge on both the can and the lid, significantly reducing the risk of accidental cuts. An added benefit is that the cutting mechanism typically doesn’t touch the food, promoting better hygiene. Many models also include a small pincer or magnet to safely lift the lid once it’s detached. While they might have a slight learning curve, the smooth, safe finish is well worth it.
- Fixed Can Openers: These are simpler, often older-style manual can openers with no moving parts. They typically feature a sharp point that pierces the can and a lever that the user presses down while rotating the can. They are incredibly durable due to their minimal components, but they do create ragged edges and require more manual effort and a specific technique to use effectively.
Electric Can Openers
For those seeking convenience or who may have limited hand strength or mobility issues, electric can openers offer a hands-free, effortless solution.
- Handheld / Battery-Operated Electric Can Openers: These compact, cordless devices are a fantastic compromise for those who want the ease of an electric opener without the bulk of a countertop model. You typically place the opener on the can’s lid and press a button; the opener then travels around the can, cutting the lid. Many of these models operate with a side-cut mechanism, leaving a smooth, safe edge. They are usually battery-powered, offering portability and easy storage in a drawer. However, remember to keep spare batteries on hand!
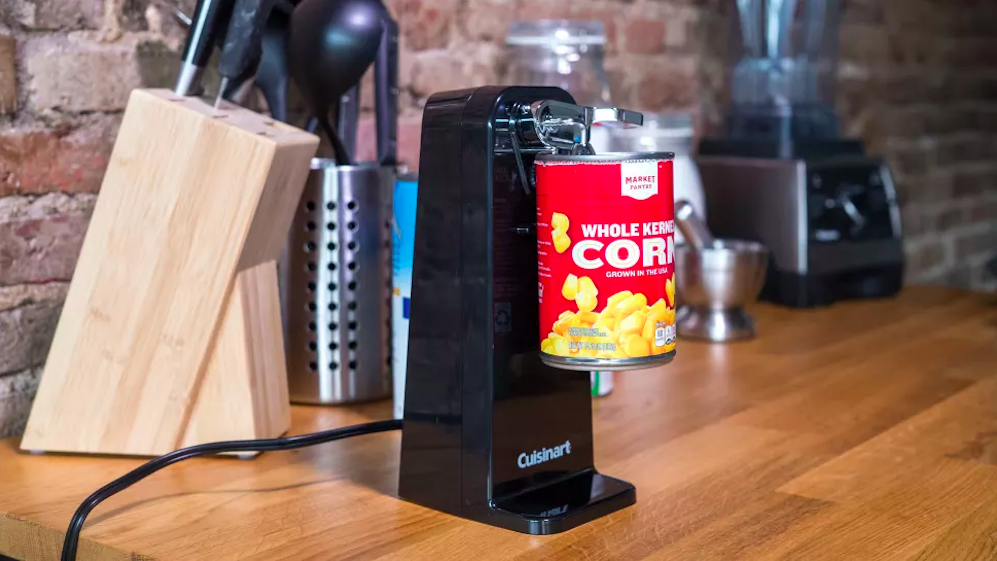
- Countertop / Stand-Up Electric Can Openers: These are larger appliances that sit on your kitchen counter. You typically position the can under a cutting mechanism, and with the press of a button, the machine automatically cuts and removes the lid. Many feature strong magnets to hold the lid securely once opened, preventing it from falling into the can. Some advanced models even include built-in blade sharpeners or cord storage for added convenience. While they take up counter space, their fully automatic operation is ideal for frequent use or those with significant mobility challenges.
Mastering Your Can Opener: Safe and Effective Use
Knowing how to properly use your can opener is crucial for efficiency and, most importantly, safety. Each type has its own nuances, but with a little practice, opening cans becomes second nature.
For Traditional Manual Can Openers
These are the most familiar, but still require proper technique to avoid jagged edges and slips.
- Position the Opener: Open the handles of the can opener wide. Place the cutting wheel directly on the outer rim of the can. The small gear should sit just under the lip, and the blade should be on top.
- Engage the Blade: Squeeze the handles firmly to puncture the can’s lid with the cutting blade and secure the gear onto the rim. You should feel it “lock” into place.
- Start Turning: Hold the handles steady with one hand and turn the crank or knob clockwise with the other. This will rotate the can, allowing the blade to cut around the edge. Maintain gentle but firm pressure on the handles.
- Complete the Circle: Continue turning until you’ve made a full rotation and the lid is completely detached from the can.
- Remove the Lid: Carefully release the handles. Use caution when lifting the lid, as the edges will likely be sharp. Some models have a small magnet to help lift the lid without direct contact.
For Smooth-Edge / Safety Can Openers
These require a slightly different approach but deliver a much safer result.
- Placement: Place the can opener flat on top of the can, aligning the cutting wheel and gear with the side of the can, just below the rim.
- Engage the Mechanism: Begin turning the knob. You’ll feel the opener clamp onto the can and the gears start to rotate, cutting through the side seal of the lid.
- Full Rotation: Continue turning the knob until you feel a slight release in tension or resistance, indicating that the opener has completed a full circle around the can.
- Lift the Lid: Once the cut is complete, gently lift the can opener straight up. The lid, which will have a smooth edge, should easily detach. Many safety can openers include a small pincer-like tool or magnet to grip and lift the lid cleanly.
For Electric Can Openers (Handheld & Automatic)
Electric models are designed for maximum ease, often requiring minimal effort.
- Position the Can: For countertop models, place the can firmly on the base. For handheld models, position the opener on top of the can’s lid.
- Activate: Press the start button. The can opener’s motor will engage, and the blade will begin to cut.
- Hands-Free Operation: Most electric can openers are designed for hands-free operation. They will typically travel around the can autonomously, stopping automatically once the lid is fully removed.
- Remove Lid: Once the cutting is complete, the lid will usually be held by a magnet, allowing for easy, safe disposal.
Choosing the Right Can Opener for Your Needs
Selecting the perfect can opener involves more than just picking the first one you see. Consider these factors to find a tool that truly fits your kitchen habits and personal needs.
- Ease of Use: This is paramount. Look for can openers with comfortable, ergonomic handles (soft grips are a bonus) and large, easy-to-turn knobs. Side-cut can openers often require less physical exertion once engaged. If you have conditions like arthritis, carpal tunnel syndrome, or simply weaker hands, a smooth-edge manual opener or an electric model will be a game-changer.
- Safety: The primary safety concern is sharp edges. Traditional top-cut can openers can leave behind dangerous metal edges. If safety is a top priority, opt for a side-cut or “safety” can opener, which leaves a smooth, burr-free edge on both the can and the lid, significantly reducing the risk of cuts.
- Size and Storage: Manual handheld can openers are the most compact and easily fit into kitchen drawers. Electric can openers, especially countertop models, require more dedicated space, either on the counter or in a cabinet. If space is at a premium, a compact manual or handheld electric can opener is your best bet.
- Durability and Material: Can openers endure a lot of strain. Look for models constructed from durable materials like stainless steel for the cutting mechanism. Plastic components are common for handles and bodies, but ensure they feel sturdy and well-made.
- Cleaning: While often overlooked, ease of cleaning contributes to a can opener’s longevity and hygiene. Most manual can openers should be hand-washed and thoroughly dried to prevent rust. Some electric models might have removable, dishwasher-safe cutting assemblies – always check the manufacturer’s instructions.
- Special Features: Many modern can openers come with extra perks. Magnets for hands-free lid removal are a huge plus for safety and convenience. Integrated bottle openers or jar openers can make a single tool even more versatile. Also, consider ambidextrous designs if multiple users in your household have different dominant hands.
Proper Care and Cleaning for Longevity
To ensure your can opener remains a reliable kitchen companion for years to come, proper care and cleaning are essential. Neglecting these steps can lead to rust, dull blades, and a less efficient tool.
- Hand Washing is Key: For most can openers, especially manual ones, hand washing with warm, soapy water is the recommended method. A quick rinse after each use to remove any food residue or sticky liquids is often sufficient.
- Thorough Drying Prevents Rust: This is perhaps the most critical step. After washing, immediately and thoroughly dry your can opener, paying close attention to any metal components, especially the blade and gears. Moisture left on metal surfaces is the primary cause of rust, which can dull the blade and hinder smooth operation.
- Consult Manufacturer Instructions: Always refer to the specific care and maintenance guidelines provided by the manufacturer. Some electric models may have removable cutting assemblies that are dishwasher-safe, while others require only wiping clean. Following these instructions will help maintain your warranty and the tool’s optimal performance.
- Sharpening (When Possible): While not all can opener blades can be sharpened, some can be given a new lease on life. A simple trick for minor dullness is to “open” a few layers of aluminum foil or a piece of fine-grit sandpaper (cutting side facing the blade) as if it were a can. This can help hone the blade’s edge. For more significant dulling, some can openers may have replaceable blades, or a professional bladesmith might be able to help. However, given their relatively low cost, replacing a severely dull can opener is often the most practical solution.
Common Can Opener Problems and Solutions
Even the best can openers can encounter hiccups. Knowing how to troubleshoot common issues can save you frustration and ensure your kitchen runs smoothly.
- Can Opener Jumps Off Track: This is a frequent complaint, especially with traditional manual models. Often, it’s due to insufficient pressure or improper alignment. Ensure the can opener is firmly clamped onto the can’s rim, with the gear properly engaged under the lip. Maintain steady, consistent pressure on the handles as you turn the knob. Sometimes, a slightly dented can can also cause issues; try repositioning the opener.
- Leaving Jagged Edges: If your can opener consistently leaves sharp, dangerous edges, it’s likely a traditional top-cut model. This is a design characteristic rather than a flaw. The best solution for this concern is to switch to a smooth-edge or safety can opener, which is specifically designed to cut below the rim, leaving a smooth, safe edge.
- Lid Falls Into the Can: This happens when the lid is fully detached but there’s no mechanism to hold it. Many modern can openers, particularly electric and smooth-edge manual types, come with integrated magnets or small pincers to grip and lift the lid away, preventing it from dropping into your food. If your current model lacks this, simply be extra cautious when removing the lid.
- Difficulty Turning the Knob: This can be a sign of a dull blade, rusted gears, or an uncomfortable design. First, try cleaning and thoroughly drying your can opener. If the issue persists, consider if the design is suitable for your hand strength. Can openers with larger, softer knobs and ergonomic handles are much easier to turn, especially for those with reduced grip strength.
- Rust Appears on Metal Parts: As discussed, rust is almost always caused by moisture. To prevent this, always dry your can opener completely after washing. If rust has already appeared, a paste of baking soda and water or a mild rust remover can sometimes clean it up, but severe rust usually means it’s time for a replacement.
Top Can Opener Brands and Models to Consider
With so many options available, choosing a reliable can opener can feel overwhelming. Here are some highly-regarded brands and specific models that consistently receive praise for their performance, durability, and user-friendliness, aligning with the “Perfect Can Opener” brand’s commitment to quality.
Manual Can Openers:
- OXO Good Grips Soft-Handled Manual Can Opener: This model is a perennial favorite, known for its comfortable, oversized soft-grip handles and a large, easy-to-turn knob. While it’s a traditional top-cut style, it’s praised for creating relatively smooth edges and being very intuitive to use. Its robust construction ensures longevity.
- Zyliss Lock N’ Lift Can Opener: What sets this manual opener apart is its innovative “lock and lift” mechanism. Once the blade punctures the can, the handles lock into place, reducing the need for constant squeezing. It also features a built-in magnet to lift the lid effortlessly after opening, ensuring hands-free disposal and enhanced safety.
- Kuhn Rikon Safety Can Opener: For those prioritizing safety above all else, the Kuhn Rikon is a top contender. This smooth-edge, side-cut can opener leaves no sharp edges on either the can or the lid, minimizing the risk of cuts. It’s also praised for its hygienic design, as the cutting mechanism doesn’t touch the food. It may have a slight learning curve, but the safe results are well worth it.
- Bartelli Soft Edge 3-in-1 Ambidextrous Safety Can Opener: This versatile tool not only opens cans with a smooth edge but also incorporates a bottle opener and a jar opener, making it a true multi-tasker. Its ambidextrous design makes it suitable for both left and right-handed users, and its compact size is a bonus.
Electric Can Openers:
- Kitchen Mama Electric Can Opener (Handheld): If you’re looking for an electric opener that doesn’t hog counter space, the Kitchen Mama handheld model is an excellent choice. It’s battery-operated, compact, and designed for one-touch, hands-free operation. It cuts along the side of the can, leaving a smooth edge, and is particularly beneficial for individuals with limited hand strength or mobility issues.
- Hamilton Beach Electric Automatic Can Opener (Countertop): For a traditional countertop electric experience, the Hamilton Beach model is a reliable pick. It offers fully automatic operation, securely holding the can and removing the lid with the press of a button. Many versions feature a magnetic lid holder for safe disposal and sometimes even a built-in blade sharpener for versatility.
When considering these options, remember to weigh their features against your specific kitchen needs, usage frequency, and any personal preferences for ease of use or safety.
Frequently Asked Questions (FAQ)
Are electric can openers worth it?
Yes, electric can openers can be incredibly worthwhile, especially for individuals who use canned goods frequently, or those with mobility concerns like arthritis. They offer effortless, hands-free operation and often provide a smoother, safer cut than traditional manual models. Handheld electric models are particularly convenient as they save counter space.
How do you clean a can opener?
Most can openers are best cleaned by hand-washing with warm, soapy water immediately after use to remove any food residue. It’s crucial to dry all metal parts thoroughly with a cloth to prevent rust and keep the blades sharp. Always check your manufacturer’s specific cleaning instructions, as some electric models may have removable, dishwasher-safe components.
How do you sharpen a can opener blade?
While some can openers can be sharpened, it depends on the design. For minor dullness, you can try “cutting” through several layers of aluminum foil or a piece of fine-grit sandpaper (cutting side towards the blade) as if opening a can. Some electric can openers feature a built-in blade sharpener. However, for heavily dull or rusted blades, replacing the can opener is often the most effective solution.
Why does my can opener leave sharp edges?
If your can opener leaves sharp edges, it’s likely a traditional “top-cut” manual can opener. These models cut into the top of the can’s lid, which naturally creates a sharp metal edge. For a smoother, safer finish, consider upgrading to a “side-cut” or “safety” can opener, which cuts along the side of the can below the rim.
Can I put my can opener in the dishwasher?
Generally, it’s best to avoid putting most manual can openers in the dishwasher. The harsh detergents and high heat can dull the blades and lead to rust, especially on older models or those with non-stainless steel parts. Always hand wash and thoroughly dry your manual can opener. For electric models, consult the manufacturer’s instructions; some might have dishwasher-safe removable parts.
What is a smooth-edge can opener?
A smooth-edge can opener, also known as a safety can opener or side-cut can opener, is designed to cut along the side of the can, just below the rim, rather than through the top. This method leaves a smooth, safe edge on both the lid and the can, eliminating sharp metal edges and reducing the risk of injury. It also prevents the blade from touching the food, which can improve hygiene.
Conclusion
The can opener, while seemingly simple, is a cornerstone of kitchen functionality. From its rudimentary beginnings as a tool of necessity to the sophisticated manual and electric models available today, it has evolved to prioritize efficiency, ease of use, and paramount safety. Investing in a high-quality can opener that aligns with your specific needs—whether it’s the ergonomic comfort of a manual smooth-edge design or the effortless power of an electric model—can genuinely transform your cooking experience. Understanding the various types, knowing how to use them correctly, and committing to proper care ensures that this essential kitchen tool will continue to serve you reliably, making every meal prep seamless and secure. Choose wisely, care for it well, and embrace the effortless start to your culinary adventures that a perfect can opener provides.