In a world brimming with smart gadgets and electric kitchen aids, the humble manual can opener often feels like a relic. Yet, for its sheer reliability, simplicity, and indispensable role in kitchens worldwide, the manual can opener remains a beloved essential. It’s the unsung hero that ensures a quick meal, a well-stocked pantry during a power outage, or simply the satisfaction of opening a can with your own hands. This guide will take you on a journey through its fascinating history, diverse types, proper usage, and how to choose and maintain the perfect manual can opener for your culinary adventures.
|
Our Picks for the Best Can Opener in 2026
As an Amazon Associate I earn from qualifying purchases.
|
||
| Num | Product | Action |
|---|---|---|
| 1 | Zulay Kitchen Heavy Duty Stainless Steel Can Opener Manual with Bottle Opener - Rust Proof Manual Can Opener With Turn Knob & Comfy Soft Grip Handles - Black |

|
| 2 | Davivy Can Opener Extra-Tall Electric, Stainless Steel 3-in-1 Can Opener with Knife Sharpener & Bottle Opener, Automatic One-Touch Operation, Wide Stable Base, Cord Storage, Fiery Red |
|
| 3 | KitchenAid Classic Multifunction Can Opener and Bottle Opener Easy to Use, Razor Sharp Stainless Steel Cutting Wheel, Soft Ergonomic Handles, Pistachio |
|
| 4 | Commercial Can Opener, ICEKATl Can Opener Manual Heavy Duty Easy for Big Cans with Magnet, Folding Hand Crank With Comfortable Long Handles |
|
| 5 | Heavy Duty Manual Can Opener Smooth Edge, Hand Crank Cans Opener for Adults Seniors, Kitchen Camping Tools, Stainless Steel, Black |
|
| 6 | Can Opener, No-Trouble-Lid-Lift Manual Handheld Can Opener with Magnet, Smooth Edge Safe Cut for Beer/Tin/Bottle, Big Turning Knob Anti-Slip Handle Good for Seniors with Arthritis |
|
| 7 | GORILLA GRIP Heavy Duty Stainless Steel Smooth Edge Manual Can Opener, Soft Comfortable Handle, Large Handheld Turn Knob, Built-In Bottle Openers, US Designed, Holiday Prep Kitchen Essential, Black |
|
| 8 | Kitchen Mama Auto Electric Can Opener: Open Your Cans with A Simple Press of Button - Automatic, Hands Free, Smooth Edge, Food-Safe, Battery Operated, YES YOU CAN (White) |
|
| 9 | Can Opener Manual, Handheld Strong Heavy Duty Stainless Steel Can Opener, Comfortable Handle, Sharp Blade Smooth Edge, Can Openers with Multifunctional Bottle Opener |
|
| 10 | Premium Multifunctional Magnetic Manual Can Opener and Bottle Opener, Heavy Duty Stainless Steel Sharp Cutting Blade and Oversized Easy Turn Knob, Soft-Touch Handle, Kitchen Use, Orange |
|
A Trip Down Memory Lane: The Surprising History of the Manual Can Opener
Believe it or not, canned food existed for decades before a dedicated tool was invented to open it. When Peter Durand patented the tin can in 1810, early cans were so thick they came with instructions like “open with hammer and chisel.” Imagine the effort for a simple can of beans!
The first true breakthroughs came in the mid-19th century. In 1855, Robert Yeates, a surgical instrument maker from the UK, patented a claw-shaped “lever-type” can opener. A few years later, in 1858, Ezra Warner in the U.S. patented a similar lever-style opener, often described as a bayonet and sickle combination, which was effective but rather dangerous for everyday use. These early designs were far from user-friendly, turning the act of opening a can into a battle of wits and strength.
The game-changer arrived in 1870 with William Lyman’s rotating wheel design. His invention introduced a sharp cutting wheel that traversed the can’s rim. However, it still required piercing the can’s center first, making it cumbersome. The manual can opener as we largely recognize it today emerged with a crucial improvement in 1925 by the Star Can Opener Company: the addition of a second, serrated wheel. This “feed wheel” gripped the can’s edge firmly, allowing the cutting wheel to effortlessly slice through the lid. This ingenious design, still widely used, made can opening safer, quicker, and much more efficient.
During World War II, compact and robust designs like the American P-38 and P-51 were developed for military rations, showcasing the manual can opener’s vital role in various contexts. While electric can openers gained popularity in the late 1950s, the manual version has never truly faded, prized for its portability, reliability, and independence from power sources.
Different Strokes for Different Cans: Types of Manual Can Openers
When you think of a manual can opener, you might picture one specific style, but there are actually a few variations, each with its own cutting mechanism and advantages:
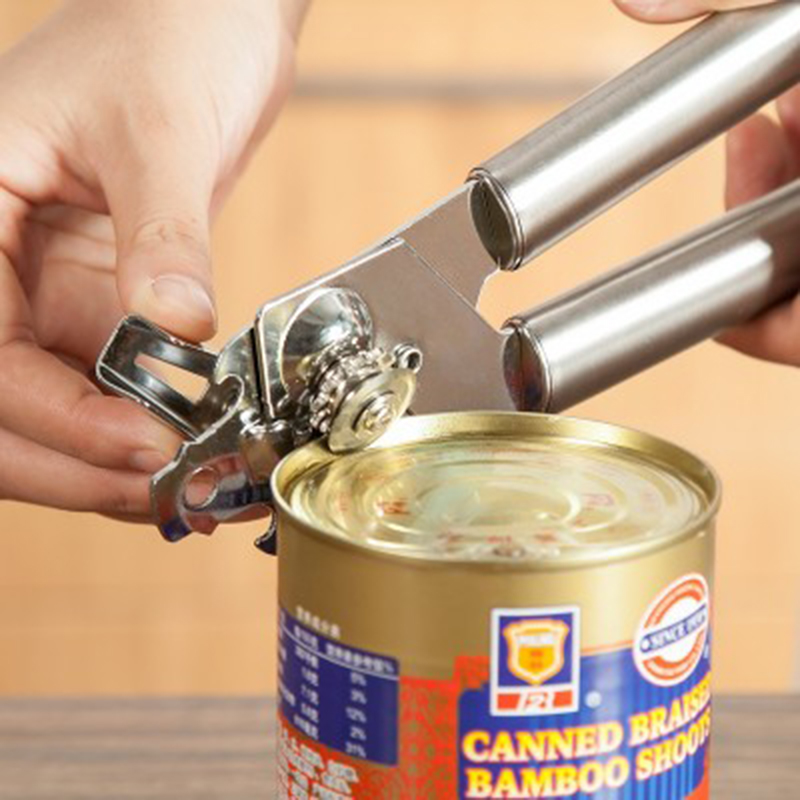
1. Traditional Rotary (Top-Cut) Can Openers
This is likely the most common type. It features two handles that clamp onto the can’s rim, with a cutting wheel and a serrated feed wheel. As you turn a crank, the wheels rotate, and the blade slices into the top of the lid, just inside the rim.
- How they work: You squeeze the handles to pierce the lid, then turn the crank clockwise. The feed wheel grips the can, moving it around as the cutting wheel slices.
- Pros: Intuitive to use, widely available, generally affordable.
- Cons: Can leave sharp, jagged edges on both the lid and the can, posing a safety risk. The lid often falls into the can’s contents.
2. Smooth-Edge (Side-Cut or Safety) Can Openers
These modern manual can openers are designed with safety in mind. Instead of cutting into the top, they cut along the side of the can, just below the rim.
- How they work: The opener latches onto the side of the can, and as you turn the knob, it separates the lid from the can by cutting through the adhesive seal or the side wall.
- Pros: Leaves smooth, blunt edges on both the can and the lid, making them safer to handle. The lid can often be re-used for temporary storage or easily lifted off without touching the food. Many designs are also ambidextrous or easier for those with limited hand strength.
- Cons: Can sometimes be less intuitive to use at first, and some models may require a bit more effort.
3. Butterfly/Lever-Type Can Openers
While less common as primary openers today, these older designs typically feature a pointed blade and a hook.
- How they work: The blade is used to puncture the lid, and then the hook acts as a lever to pry open and cut along the rim.
- Pros: Very compact, simple design.
- Cons: Often difficult to use, very slow, and leaves extremely sharp, jagged edges.
4. Church Key/Bottle Opener Combo
These are not designed for cans with full lids but are excellent for puncturing small holes in juice cans or lifting bottle caps. Sometimes, a “church key” style opener is integrated into other manual can opener designs for versatility.
Mastering the Twist: A Step-by-Step Guide to Using Your Manual Can Opener
Even the most straightforward tool benefits from proper technique. Here’s how to use both traditional and smooth-edge manual can openers effectively and safely.
Using a Traditional Rotary Can Opener:
- Prepare Your Area: Place the can on a stable, flat surface. Wipe down the can lid to remove any dust or debris. Ensure your can opener is clean and free of rust.
- Position the Opener: Open the handles of your manual can opener wide. Align the cutting wheel directly over the can’s rim, ensuring the serrated feed wheel is securely underneath the rim.
- Engage the Blade: Squeeze the handles firmly until you feel the cutting wheel puncture the can lid. You might hear a slight hiss as the can’s vacuum seal breaks. Maintain steady pressure.
- Start Turning: With one hand holding the handles firmly, use your other hand to turn the crank handle clockwise. The can opener should steadily move around the can, slicing the lid.
- Complete the Cut: Continue turning until you’ve gone almost all the way around the lid. Leave a small section uncut, or if your opener has a magnet or mini-pliers, use them to lift the lid off.
- Remove the Lid: Carefully lift the can opener, taking the lid with it. Be extremely cautious of the sharp edges on both the lid and the can. You can use the opener itself or a fork to pry the lid completely off, avoiding direct hand contact.
Using a Smooth-Edge (Safety) Can Opener:
- Position the Opener: Place the manual can opener flat on top of the can. It will usually have a flat shelf or guides that sit on the can’s top surface.
- Engage the Mechanism: Turn the knob, typically clockwise, until the cutting mechanism engages with the side of the can, just below the rim. Some models will “lock” into place, requiring no squeezing.
- Rotate and Cut: Continue turning the knob. The opener will travel around the can, cleanly separating the lid from the body.
- Release and Remove: Once you’ve made a full rotation, the lid should be detached but often remains on top, held by the opener or simply resting. Release the opener by turning the knob counter-clockwise slightly or pressing a release button. Lift the opener, and the lid should come off with it, leaving a smooth, safe edge on the can.
“A good manual can opener isn’t just a tool; it’s a trusty companion in the kitchen. Learning to use it correctly ensures safety and efficiency, transforming a mundane task into a seamless part of your cooking process,” advises Chef Elena Petrova, a seasoned kitchen tools expert.
More Than Just a Tool: Tips for Choosing the Perfect Manual Can Opener
Selecting the right manual can opener can significantly impact your cooking experience. Here’s what to look for:
- Ergonomics and Comfort: This is paramount, especially if you open cans frequently or have limited hand strength. Look for models with large, soft-grip handles that fit comfortably in your hand. A large, easy-to-turn knob also makes a big difference in reducing strain.
- Cutting Style: Decide between traditional top-cut (faster, but sharp edges) or smooth-edge side-cut (safer, but might feel less intuitive initially). Many prefer side-cut models for their safety benefits.
- Material and Durability: Stainless steel is a popular choice for its durability and resistance to rust. Ensure the hinges are tight and the overall construction feels solid, not flimsy.
- Ease of Cleaning: Some models are dishwasher-safe, but many require hand washing. Can openers with wider-opening hinges can be easier to clean thoroughly, preventing food buildup that can hinder performance.
- Extra Features:
- Lid-lifting magnets: Many modern designs incorporate a small magnet to lift the lid once it’s cut, allowing for hands-free disposal.
- Integrated pliers/tongs: Some have small pliers to help grip and remove the lid safely.
- Multi-functional designs: Certain models might include a bottle opener or jar gripper, adding versatility.
A quality manual can opener typically costs between $15 and $30, though high-end stainless steel models can be more. Investing a little more can often mean better comfort, durability, and safety in the long run.
Keeping It Sharp: Proper Care and Maintenance for Longevity
To ensure your manual can opener remains a reliable kitchen workhorse, a little care goes a long way:
- Clean After Every Use: Food residue can accumulate on the cutting wheel and gears, leading to dullness, rust, or blockages. Use a small brush or toothpick to dislodge any stuck-on food.
- Hand Wash Recommended: While some stainless steel models claim to be dishwasher safe, hand washing with mild soap and warm water is often best to protect the cutting mechanism and prevent rust.
- Dry Thoroughly: Moisture is the enemy of metal. After washing, dry your can opener completely before storing it to prevent rust and corrosion.
- Inspect Regularly: Periodically check for loose screws, worn components, or misaligned parts. Tighten any loose screws. If the cutting wheel appears dull or the gears are worn, it might be time for a replacement.
- Light Lubrication (if needed): For older or stiffer models, a tiny drop of food-grade mineral oil on the moving parts can help maintain smooth operation, though this is rarely needed for newer models.
When Things Go Sideways: Common Manual Can Opener Problems and Solutions
Even the best manual can opener can encounter issues. Here are some common problems and how to troubleshoot them:
Problem: Can opener isn’t cutting or keeps slipping.
- Possible Causes: Dull blade, misaligned gears, food residue build-up, insufficient pressure, or worn-out feed wheel.
- Solutions:
- Clean it: Thoroughly clean the cutting wheel and feed wheel to remove any dried food particles.
- Realign: Ensure the cutting wheel is perfectly aligned with the can’s rim and that the feed wheel is gripping properly.
- Apply pressure: Make sure you’re squeezing the handles firmly enough (for traditional models) or engaging the mechanism fully (for safety openers).
- Inspect for wear: If the blade is visibly dull or the gears are stripped, it’s likely time for a new opener.
Problem: The lid is stuck or falls into the can.
- Possible Causes: Not cutting all the way around, or for traditional openers, the lid edges are too sharp to handle easily.
- Solutions:
- Complete the cut: Ensure you’ve made a full rotation. For traditional openers, try making another small turn past the starting point to ensure a complete cut.
- Use a tool: Instead of your fingers, use the opener’s integrated magnet/pliers, a fork, or a knife tip (carefully!) to lift the lid.
- Consider a safety opener: If sharp edges are a recurring concern, a smooth-edge manual can opener eliminates this problem entirely.
Problem: Hard to turn the crank.
- Possible Causes: Rust, dried food, or internal wear.
- Solutions:
- Clean and dry: Clean the crank mechanism thoroughly and ensure it’s dry.
- Lubricate: A very small amount of food-grade oil can help if rust is the issue, but excessive stiffness usually indicates internal wear requiring a replacement.
Who Makes the Cut? Top Brands and Models
While specific model recommendations can change frequently, several brands consistently receive high marks for their manual can openers. Brands like OXO are frequently praised for their ergonomic designs, comfortable grips, and smooth operation, offering both traditional and smooth-edge options. Zyliss is known for incorporating features like locking mechanisms and lid-lifting magnets for added convenience and safety. Kuhn Rikon excels in safety can openers, providing designs that ensure no sharp edges. When researching, look for trusted kitchenware brands that prioritize user comfort, durability, and a clean cutting experience.
Frequently Asked Questions (FAQ)
Q1: Are manual can openers better than electric ones?
A1: It depends on your needs! Manual can openers are praised for their portability, reliability (they don’t need power), compactness, and ease of cleaning. Electric can openers offer convenience and are great for those with limited hand strength, but they take up counter space and need electricity.
Q2: How do I know if my manual can opener is dull?
A2: A dull manual can opener will require excessive force to cut, slip frequently, or leave ragged, incomplete cuts. If cleaning and realigning don’t improve performance, the blade is likely dull, and it’s time for a replacement.
Q3: What is a “safety” can opener, and why should I use one?
A3: A safety, or smooth-edge, manual can opener cuts along the side of the can, below the rim, rather than into the top. This leaves a smooth, blunt edge on both the can and the lid, significantly reducing the risk of cuts and making the lid safer to handle and dispose of.
Q4: Can I put my manual can opener in the dishwasher?
A4: Most manufacturers recommend hand washing manual can openers. The harsh detergents and high heat of dishwashers can dull the blade, damage plastic components, and lead to rust, particularly in the intricate gear mechanisms. Always check the manufacturer’s care instructions.
Q5: My can opener leaves metal shavings in my food. What’s wrong?
A5: Metal shavings typically indicate a dull or damaged cutting wheel, or improper use. Ensure your opener is clean and aligned correctly. If the problem persists, it’s a strong sign the opener needs to be replaced to avoid compromising food safety.
The Perfect Cut: Elevating Your Kitchen with the Right Manual Can Opener
The manual can opener is a testament to timeless design—a simple tool that, when chosen and maintained correctly, performs its task with unwavering efficiency. From its humble beginnings requiring hammers and chisels to today’s ergonomic, smooth-edge innovations, this kitchen essential has consistently adapted to make our lives easier. Whether you’re a gourmet chef or just someone who enjoys the convenience of canned goods, understanding your manual can opener ensures safety, longevity, and a smooth start to every meal. So, take a moment to appreciate this steadfast companion, and equip your kitchen with a “Perfect Can Opener” that truly makes the cut.